
Your warehouse marks an order as shipped, but Shopify still shows it as unfulfilled. Your support team checks two dashboards, and your customer asks why tracking has not arrived. A Shopify app API integration can connect those systems, but adding a connection without deciding which system controls each field can create duplicate orders, stale inventory, or conflicting updates.
How to Plan a Shopify App Integration With Your Existing Tech Stack covers how to map your data, choose the right API, set access permissions, and plan for failed requests before development starts. You identify what needs to move between Shopify and your business software, how quickly it needs to arrive, and who fixes the connection when something breaks.
Start with one workflow rather than a list of tools. For example, a paid order needs to reach your warehouse, and its tracking number needs to return to Shopify. Your Shopify app API integration requirements should name those events, the required fields, and the acceptable delay. Do not assume every update needs to happen instantly; tighter timing adds complexity and can increase your Shopify API integration cost.
The goal is a connection your team can operate, not just one that passes a demo. Before choosing a ready-made connector or a custom build, define how you detect missing updates, retry safely, and test changes without disrupting live orders.
Table of Contents
- Step 1: Map the systems and outcomes your integration must support
- Step 2: Choose the Shopify API and integration approach
- Step 3: Document API requirements, data fields, and sync rules
- Step 4: Set up authentication, permissions, and data protection
- Step 5: Build data sync and webhook handling
- Step 6: Test the integration before connecting live workflows
- Step 7: Estimate integration cost and prepare for launch
Step 1: Map the systems and outcomes your integration must support
Before you choose an app or request a development estimate, write down what needs to move between systems and why. Your Shopify app API integration needs a clear operating plan, not just a list of tools that offer API access.
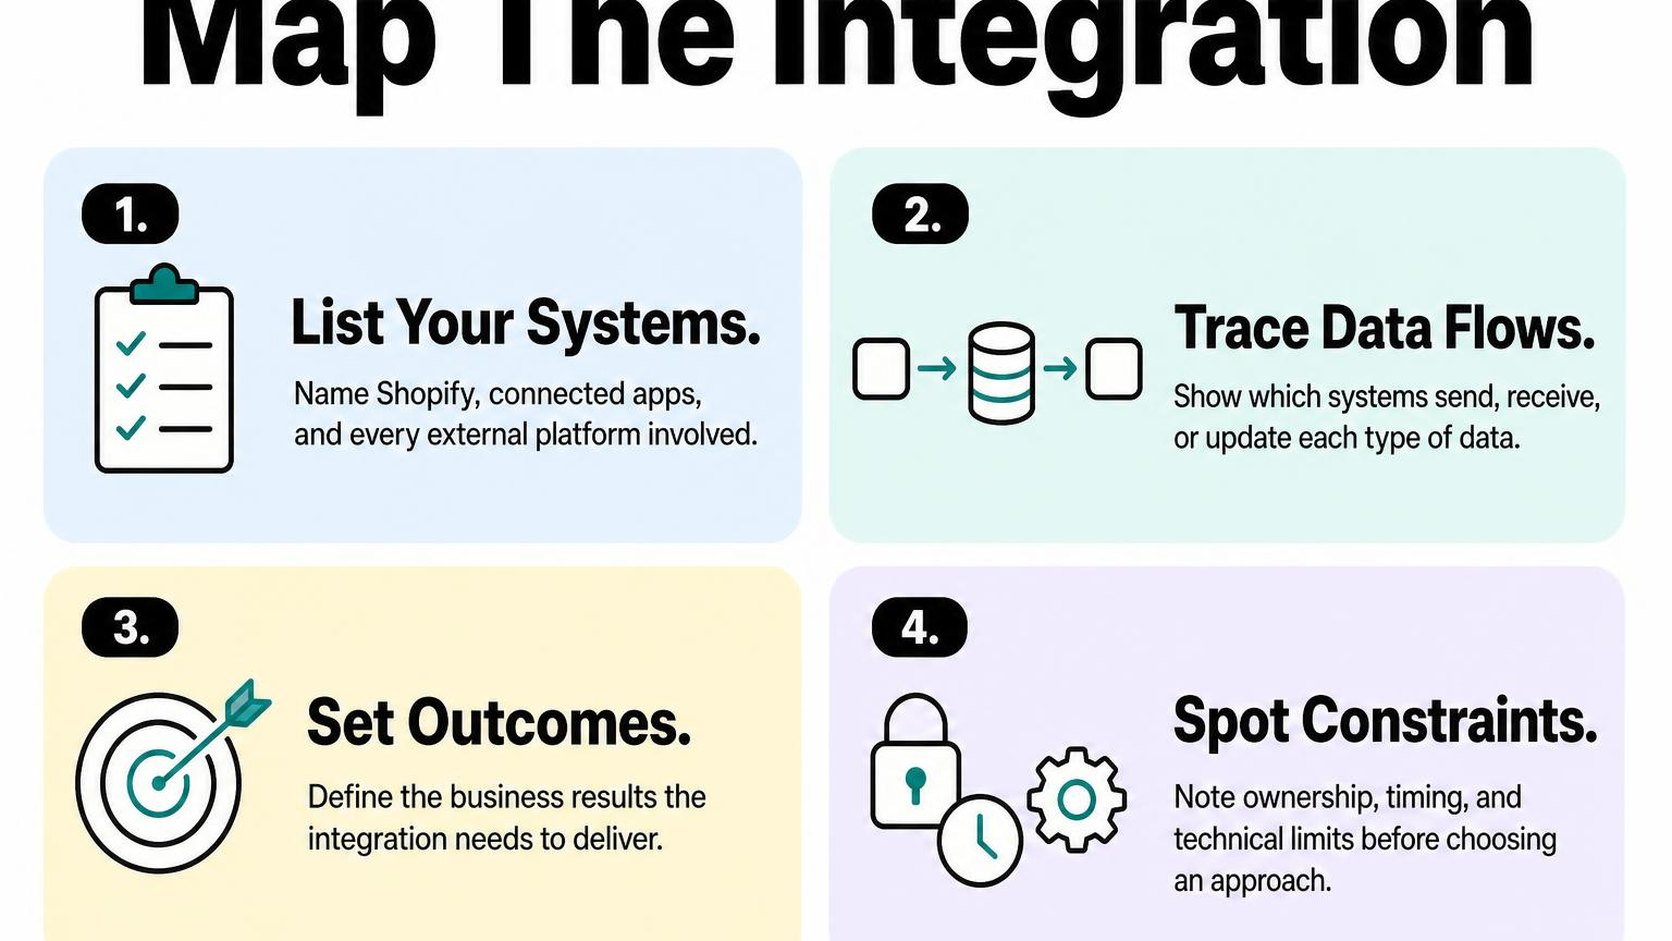
Start with one costly handoff, such as sending paid orders to your warehouse or returning tracking numbers to Shopify. Connecting every system at once increases testing work and makes it harder to identify which connection causes a problem.
List the Shopify and business software involved
Create a shared inventory of your Shopify store, warehouse software, accounting platform, customer support tool, and any spreadsheets that staff still update manually. Include existing connectors: a connection that already updates inventory can conflict with a new one.
For each system, record its business purpose, administrator, available API access, and the records it reads or changes. Treat API availability as something to verify against your subscription and permissions, rather than assuming a software logo on an integrations page guarantees access.
- Store setup: List the Shopify stores, markets, inventory locations, and sales channels that the workflow covers.
- Record matching: Identify how systems match products, variants, orders, and customers. Check whether SKUs are unique and populated before using them as matching keys.
- Existing connections: Record installed apps, scheduled exports, manual imports, and automations that touch the same records.
- Data boundaries: Note which customer fields each system genuinely needs. Use customer data integration planning to review customer-record mapping before expanding the scope.
Define a system of record: the system whose value wins when two tools disagree about a particular field. Assign this field by field; your warehouse can control available stock while Shopify controls the product description.
| Data | Authoritative system | Receiving system |
|---|---|---|
| Paid order details | Shopify | Warehouse software |
| Available stock by location | Warehouse software | Shopify |
| Shipment tracking | Warehouse software | Shopify |
Define the workflows, owners, and success measures
Describe each workflow as a trigger, an action, and an expected result. “When an eligible order becomes paid, send it to the warehouse once” gives your developer a clearer requirement than “sync orders.”
Separate the data owner, who decides what a record should contain, from the person responsible for investigating failed transfers. Your Shopify app integration data sync also needs rules for cancellations, partial shipments, missing SKUs, and outages—not just successful orders.
- Workflow boundary: Specify included order types, locations, and statuses, plus anything deliberately excluded from the first release.
- Named responsibility: Assign a person to approve field mappings and a person to resolve sync failures.
- Measurable result: Set targets such as tracking appearing within ten minutes or zero duplicate warehouse orders during the pilot.
- Baseline and recovery: Record current manual effort and decide how staff identify and safely retry missed transfers.
Practical rule: Approve the system map, field ownership, and acceptance targets before choosing an implementation. Faster updates can increase complexity and Shopify API integration cost; do not demand immediate synchronization for data your team only uses once a day.
Step 2: Choose the Shopify API and integration approach
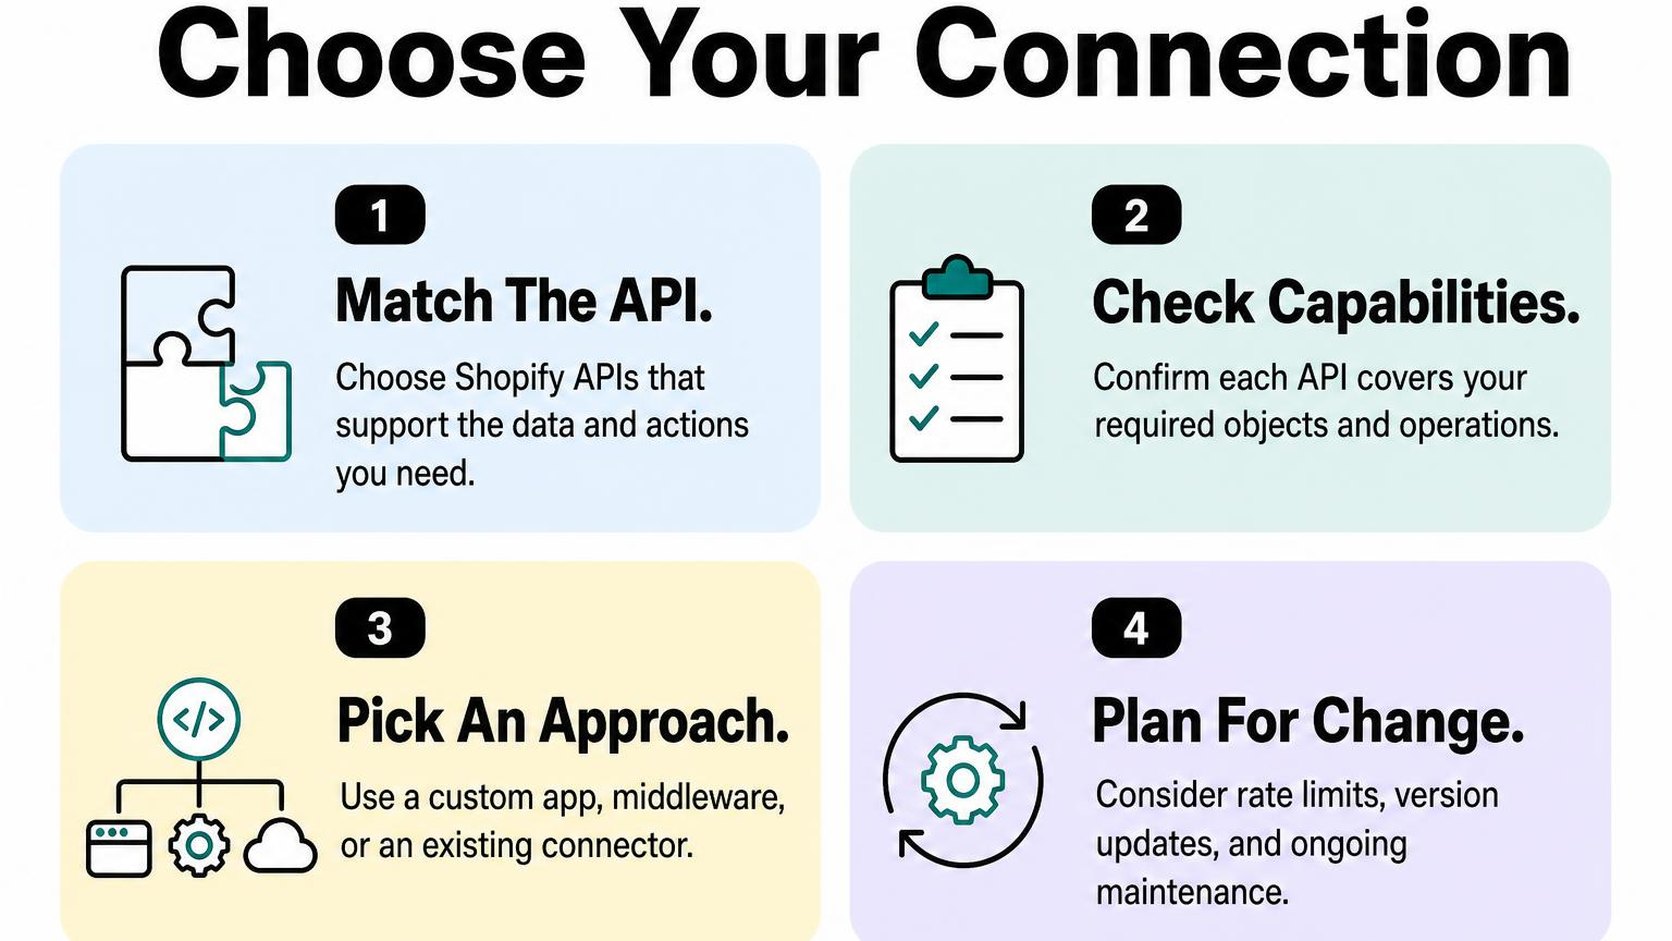
Your warehouse needs order details, while your custom storefront needs products and a cart. Those jobs require different access. For your Shopify app API integration, choose the API by what the workflow must read or change, then choose how to connect the systems.
Match Admin API or Storefront API to the use case
The Admin API lets authorized software access store management data and operations, such as orders, inventory, products, and fulfillment. Use Shopify Admin API integration when your accounting platform imports orders or your warehouse updates stock. Shopify’s API selection documentation recommends the GraphQL Admin API for new integrations and identifies the REST Admin API as legacy.
The Storefront API supports customer-facing shopping experiences, including browsing products and building carts. Choose Shopify Storefront API integration for a custom website or shopping interface, not as a shortcut for back-office access. Some projects need both APIs, but each connection should have a specific purpose.
| Workflow | API choice | Planning check |
|---|---|---|
| Send orders to business software | Admin API | Confirm order permissions and required customer fields. |
| Update inventory from a warehouse | Admin API | Match inventory items and Shopify locations. |
| Display products and build a shopping cart | Storefront API | Confirm product availability for that sales channel. |
Include permissions and authentication in your Shopify app API integration requirements before approving development. Access scopes define what an app can read or write; request only those your workflow needs. Keep Admin API credentials out of browser code, and confirm whether access to protected customer data needs additional approval.
- Background work: Ask how Shopify API authentication for apps supports scheduled jobs when no staff member is signed in.
- Change notifications: Use webhooks to notify your integration about relevant events, then retrieve or update data through the appropriate API. Plan for duplicate notifications and missed deliveries.
Decide between a third-party connector, custom app, or middleware
A third-party connector provides a packaged connection between supported systems. Middleware sits between systems to route data and apply workflow rules. A custom app implements behavior for your requirements, giving you more control but also responsibility for maintenance.
- Choose a connector: Use one when its supported fields, permissions, sync direction, and handling of refunds or fulfillments match your process. Do not assume a listed software connection covers every workflow.
- Choose middleware: Use it when several systems exchange data or transformations need a shared home. Check execution charges, retry controls, logs, and who maintains the workflows.
- Choose a custom app: Use one when packaged options cannot handle essential rules or access requirements. Start by scoping a custom Shopify app so the build has clear boundaries.
Practical rule: Test the hardest required workflow before committing. Compare ongoing support, monitoring, and usage charges—not just setup fees—when estimating Shopify API integration cost.
Step 3: Document API requirements, data fields, and sync rules
Your warehouse changes a stock count, but Shopify still shows yesterday’s quantity. Before development starts, turn that gap into written Shopify app API integration requirements: which system controls the value, what triggers an update, and what happens when delivery fails.
Keep this document specific enough for a developer to build against and your operations team to test. “Sync inventory” is not a requirement; “send available stock from the warehouse to the matching Shopify location within five minutes” is.
Map records and fields between Shopify and each system
Start with the records your workflow needs: products, variants, customers, orders, inventory, or fulfillments. For every field, name a source of truth: the system whose value wins when systems disagree.
Record identifiers, formats, required values, and transformations. A SKU can help match variants, but it is unsafe as the only identifier if your catalog contains duplicates or your team changes SKUs.
| Record or field | Mapping rule | Owner and validation |
|---|---|---|
| Product variant | Store the Shopify variant ID beside the ERP item ID | ERP owns item identity; flag unmatched records |
| Inventory | Map warehouse stock to a Shopify inventory item and location | Warehouse owns available quantity; define safety stock deductions |
| Order | Save the Shopify order ID on the accounting record | Shopify owns order origin; separate refunds from new sales |
| Customer | Keep linked system IDs; review ambiguous email matches | Assign ownership per field; avoid automatic profile merges |
For Shopify Admin API integration, identify the queries and mutations each workflow needs, then document access scopes and authentication. Shopify recommends the GraphQL Admin API for new integrations in its API selection guidance; do not assume a storefront-facing API provides the administrative access your workflow requires.
Include API version, expected daily volume, peak traffic, and whether customer-data access needs approval. Request only necessary permissions, and keep credentials out of your mapping spreadsheet.
Set sync direction, frequency, conflict rules, and recovery behavior
Define each workflow separately rather than labeling the whole connection “two-way.” You can send orders outward immediately while receiving stock updates on a schedule; these data sync methods and examples help you distinguish the options.
A webhook is an event notification that can trigger processing, not proof that both systems now agree. Pair Shopify API webhooks integration with periodic reconciliation that checks for missed or inconsistent records.
- Direction and timing: Name the sender, receiver, trigger, acceptable delay, and initial import sequence for each record type.
- Conflicts: Choose ownership per field. Do not let the latest timestamp overwrite warehouse stock or approved prices without an explicit business rule.
- Duplicates: Make processing idempotent, meaning repeated processing produces no additional effect. Store event and record identifiers so retries cannot create another order.
- Recovery: Queue temporary failures, retry with increasing delays, and flag permanent validation errors for review. Record the failed operation, alert owner, and safe replay procedure.
- Acceptance tests: Test duplicate events, expired credentials, missing mappings, partial outages, and out-of-order updates. Verify recovery preserves valid changes rather than overwriting them.
Step 4: Set up authentication, permissions, and data protection
Your warehouse connector needs to update inventory, but its installation screen also requests customer records. Before you approve it, ask which workflow needs that access. In a Shopify app API integration, authentication establishes who can connect; permissions determine what that connection can do.
Choose the appropriate authentication flow
Authentication verifies the app or user making a request, while authorization determines the permitted actions. Shopify API authentication for apps depends on how the app is built, installed, and used. Do not assume that every integration uses a manually copied token or the same installation process.
Ask your developer to document the supported flow before implementation. Shopify’s authentication and authorization documentation explains the available flows and token types, including token exchange, authorization-code grants, and client credentials.
- Embedded apps: Use Shopify’s supported session-token and token-exchange approach where applicable, rather than treating a browser session as a permanent backend credential.
- Other installation models: Confirm whether authorization-code authorization applies. Client credentials are available only for eligible apps and stores owned by the same organization, not as a universal shortcut.
- Token context: Use online access when actions need a user context and offline access for supported background work. Document expiration and renewal behavior; “offline” does not automatically mean a token never expires.
Request only the scopes and data the integration needs
Access scopes specify the resources and operations an app can access. Apply least privilege: grant only the permissions needed for the agreed workflow. An inventory connector does not automatically need customer addresses or permission to edit products.
Turn your Shopify app API integration requirements into a permission checklist. Ask your developer to map each requested scope to a specific feature and distinguish required permissions from optional capabilities.
- Read versus write: Request read access for reporting. Add write access only where the integration must change Shopify records.
- Customer fields: Identify exactly which personal fields are necessary. Protected customer data can carry additional requirements, and public apps may need separate access approval.
- Future features: Do not request broad permissions for hypothetical work. Plan for an additional authorization step when a feature genuinely needs more access.
Protect credentials and customer information
Access tokens are credentials that let the integration make authorized requests. Keep Admin API tokens on the server in managed secret storage, restrict staff access, and separate development credentials from production credentials. Never place them in theme code, browser scripts, shared spreadsheets, or support screenshots.
Define how you revoke compromised credentials and restore access safely. For customer information, record why each field is collected, where it travels, who can access it, and when copies are deleted.
- Transport and storage: Use HTTPS and appropriate encryption at rest. Keep secrets and unnecessary personal details out of logs.
- Retention and removal: Set deletion periods and an owner for privacy requests. Include downstream software, exports, and backups in your handling plan.
Practical rule: More access makes development convenient but increases exposure. Before launch, require a permission list, credential-handling plan, and customer-data retention policy—not just a successful connection test.
Step 5: Build data sync and webhook handling
An order reaches Shopify, but your warehouse still shows nothing to pack. Your Shopify app API integration needs a clear plan for moving that change, detecting failures, and recovering without creating a second shipment.
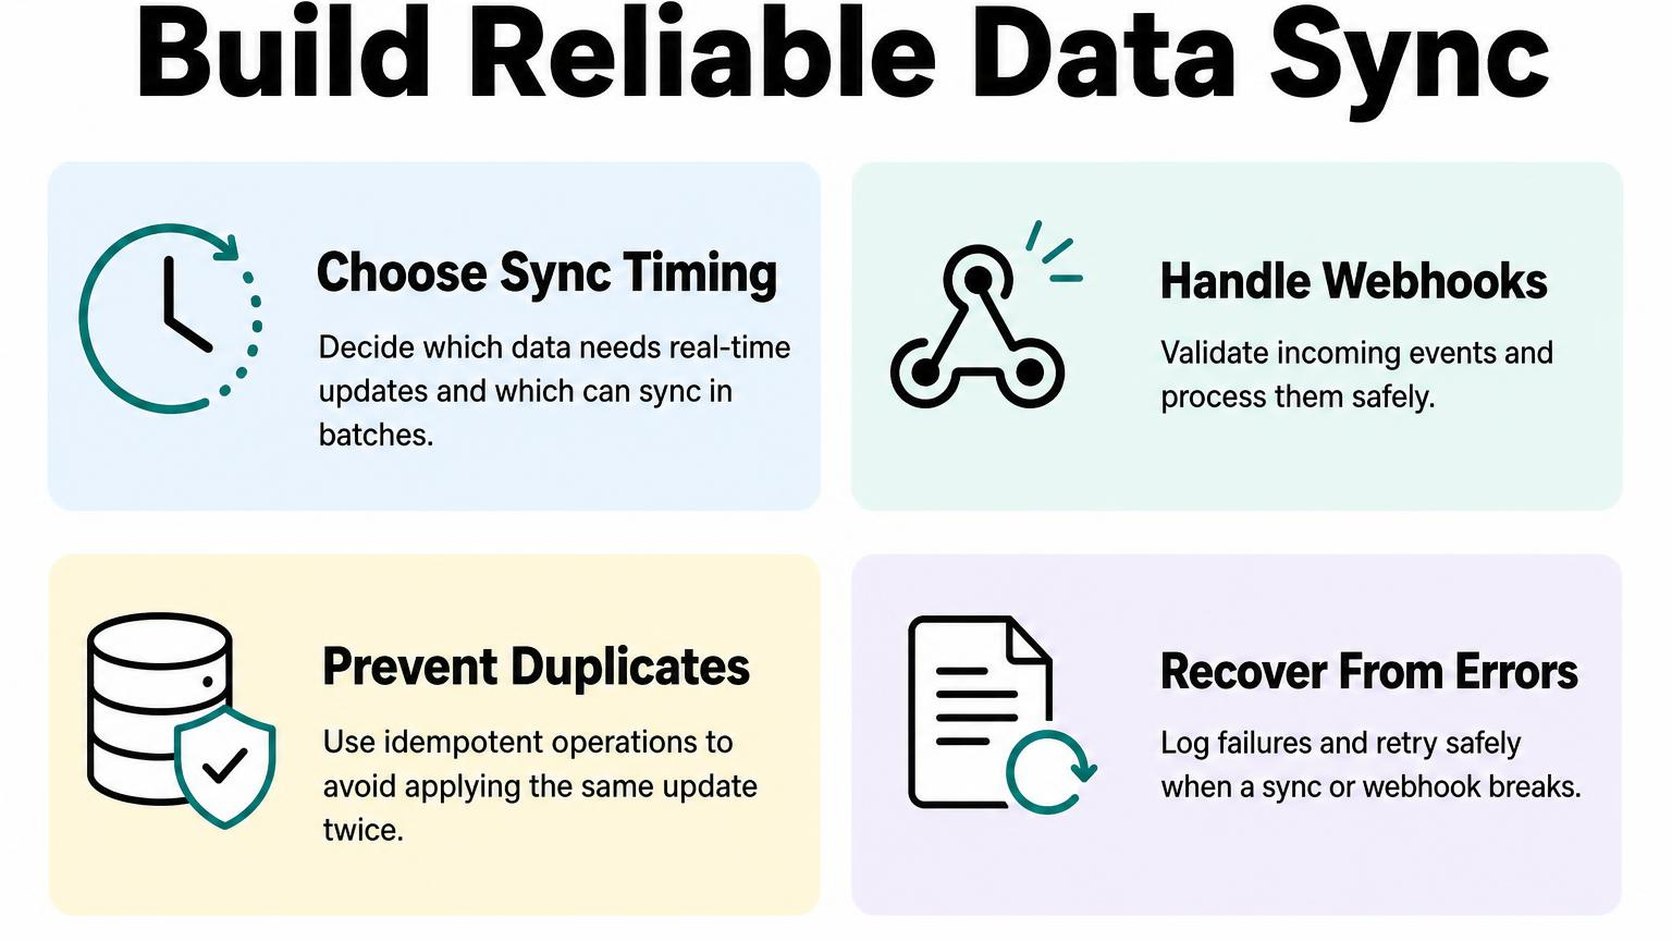
Define which system owns each field before you build the sync. Shopify might own order details while your warehouse owns fulfillment status. Without that boundary, two systems can keep overwriting each other.
Use webhooks for event-driven updates where appropriate
A webhook is an event notification sent to your integration when something changes. Use Shopify API webhooks integration for changes that need prompt action, such as new orders, cancellations, or fulfillment updates. Subscribe only to events your workflow actually uses.
Webhooks reduce repeated API checks, but they are not a complete data-sync strategy. Pair them with a scheduled reconciliation: a recurring check that compares records and repairs missed or incomplete updates.
- Event selection: Map each event to a business action, destination, and owner. An order update should not automatically trigger another shipment.
- Initial import: Plan how existing records enter the destination before routine updates take over. Capture changes during that import so the transition leaves no gap.
- Scheduled checks: Choose a frequency based on business impact and API capacity. Use overlapping time windows and checkpoints so interrupted runs can resume safely.
- Conflict rules: Define what happens when both systems change a record. Use field ownership and relevant timestamps rather than assuming the last notification received contains the newest state.
For HTTPS delivery, verify the HMAC signature, a cryptographic check that authenticates the request, using the raw request body before parsing it. Follow Shopify’s instructions for verifying webhook deliveries, and reject requests that fail verification.
Make processing reliable with retries and duplicate protection
After verification, save the event durably in a queue before acknowledging receipt. A queue holds work for background processing, so a slow warehouse API does not hold open your webhook request. Do not return success before the event is safely stored.
Build idempotency: processing the same event more than once produces the same intended result. Track delivery identifiers, but also protect business actions with stable keys, such as the Shopify order ID and destination shipment reference. A repeated notification must not create another shipment.
- Retries: Retry temporary failures with increasing delays and randomness. Respect rate-limit responses; send permanent validation failures for review instead of retrying forever.
- Ordering: Expect notifications to arrive out of order. Before applying a sensitive change, check whether the destination already has newer information or fetch the current Shopify record.
- Monitoring: Track queue age, failed jobs, retry counts, and reconciliation differences. Alert a named owner when delays exceed your agreed processing window.
- Recovery tests: Simulate duplicate events, unavailable software, and interrupted workers. Confirm that replaying failed work does not repeat completed actions.
Practical rule: Plan for delayed, repeated, and missing notifications. Your Shopify app integration data sync is ready only when you can detect a mismatch and repair it safely.
Step 6: Test the integration before connecting live workflows
Your test order reaches the warehouse, but its apartment number disappears and the discount changes the accounting total. Catch these problems while fulfillment, customer messages, and financial posting remain disconnected. Validate your Shopify app API integration in a development store connected to test accounts for each destination.
Use synthetic customer details and representative products rather than copying live customer records. Keep test credentials, webhook destinations, and queues separate from production, and disable real shipping labels and outbound email. A successful test should prove the expected business result, not just return a successful API response.
Test permissions, field mapping, and edge cases
Build a small test pack with expected results written down before you run it. Include a simple order, a multi-variant order, a discounted purchase, a partial refund, and a cancellation. Add missing optional fields, accented characters, long addresses, and different currencies if your store supports them.
- Permissions: Run each required read and write operation using the intended app credentials. Remove a required scope in the test setup and confirm that the affected workflow stops with an actionable error rather than silently skipping records.
- Field mapping: Compare source and destination values for variant identifiers, quantities, currency, discounts, tax, shipping, and addresses. Test blank values explicitly so an empty field does not erase valid information unintentionally.
- Business rules: Confirm how partial fulfillment, refunds, and cancellations appear in the destination. Check that a refunded item does not automatically return to sellable stock unless that is your agreed rule.
- Access boundaries: Attempt an operation outside the integration’s intended permissions. Verify that Shopify rejects it and that logs omit access tokens and unnecessary customer details.
Record the expected value beside the actual value for every critical field. Screenshots help explain a defect, but saved record identifiers and sanitized request details make it reproducible. Do not accept “looks right” as approval for money or inventory movements.
Check performance, error handling, and data reconciliation
Run a realistic peak batch, not just one order at a time. Measure the time from the Shopify change to the correct destination state, including queue delays. Shopify documents API-specific limits in its API rate-limit guidance, so test the limits that apply to your chosen API rather than assuming one universal request allowance.
- Failed requests: Inject a timeout, an invalid field, an expired credential, and a throttled response. Check that temporary failures recover, permanent errors reach a review queue, and alerts identify the affected record without exposing secrets.
- Duplicate events: Deliver the same notification twice and replay it after restarting a worker. Assert that the destination contains one intended business action, not merely two successful log entries.
- Reconciliation: Compare records across both systems after processing settles. Match identifiers, order counts, monetary totals by currency, and inventory at the same location; explain every difference.
- Launch gate: Save test evidence, assign unresolved defects, and obtain approval from the person responsible for each destination system. Block launch for unexplained financial or stock discrepancies.
Practical rule: Connect live workflows only after the test pack passes and a controlled replay produces no unintended changes.
Step 7: Estimate integration cost and prepare for launch
Your warehouse connection looks ready, but the quote covers only the initial build. Before approving your Shopify app API integration, check who pays for hosting, failed-job recovery, and changes when either system updates its API.
Estimate the first year, not just launch day. A narrow connection costs less to build, but manual exceptions can turn that saving into recurring work for your operations team.
Estimate build, maintenance, and third-party service costs
Ask for an estimate split into discovery, implementation, launch support, and recurring operations. Define the integration boundary—the systems, records, and actions the project covers—so each quote prices the same work.
Give your developer normal and peak order volumes, catalog size, historical import needs, and expected sync frequency. Shopify API integration cost depends on how records move and how exceptions get resolved, not simply how many apps you connect.
| Cost area | What your estimate should include |
|---|---|
| Build complexity | System connections, field mapping, transformations, and one-way or two-way sync. |
| Volume and services | Initial imports, peak traffic, hosting, queues, logs, and third-party API charges. |
| Security and testing | Access controls, secret storage, customer-data handling, and test environments. |
| Maintenance | API version updates, monitoring, incident response, and changes to connected software. |
Request separate prices for the initial data import and ongoing Shopify app integration data sync. A large backfill can need temporary processing capacity that your daily workflow does not need.
Check each provider’s billing unit: orders, tasks, API calls, storage, or users. Ask for a monthly estimate at normal volume and at your expected sales peak, including retry traffic and log retention.
For Shopify Admin API integration, allow time for queueing and throttling controls. Shopify’s API limits documentation explains API-specific limits and request-management techniques; buying more server capacity alone does not remove those constraints.
Budget rule: Separate required launch work from optional improvements, and keep a contingency tied to named uncertainties. Do not accept a fixed total that leaves maintenance, usage charges, or operational ownership undefined.
Launch in stages and assign ongoing ownership
Start with a limited live scope, such as one location or one record type. Expand only after the agreed observation period shows stable processing and your operations team can manage exceptions.
Prepare a rollback plan: the steps for stopping new writes, preserving queued work, and correcting affected records. Disconnecting an integration does not automatically undo changes already sent to another system.
- Launch window: Choose a staffed, lower-volume period and name the person who approves expansion or pauses the rollout.
- Operational readiness: Confirm production credentials, billing accounts, monitoring access, and support contacts before enabling live writes.
- Recovery responsibility: Name who stops processing, reviews affected records, and authorizes corrections before work resumes.
- Ongoing ownership: Assign a technical owner for alerts and API updates, plus a business owner for mapping changes, exceptions, and monthly cost review.
Yassine Malti writes as a developer working on store integrations, where launch planning includes the people who maintain the connection afterward.
Put this into practice
Start with the store you already have, then use the guides on the blog for the next page that needs the same treatment.
Shopify apps by Yassine Malti
Put this into practice
-

ALT SEO · Image alt text
AI alt text for every product image · 100 images/month free
-

RANKit · Meta titles & descriptions
AI meta titles and descriptions, sized for Google · 50 meta tags/month free
-

TAGit · Product tags
SEO-friendly product tags, generated in bulk · 50 tags/month free